Part 1: Let The Games Begin!
Planning a room party for your child’s class can seem daunting, but it doesn’t have to be! Most of the room parents are very happy to help in the lower grade classrooms. With some planning of games and treats, you can have a lot of fun. I wrote this article because last year, when I was looking for new ideas for my middle son’s room party, I could not find much. Everything I found was far too grotesque for a kindergarten party, and expensive too!
Here are some of the ideas I’ve used for for K-2nd grades, some are easy enough for preschoolers to do as well. As the kids get older, the classroom Halloween parties don’t seem to be as common, but you could use these ideas for a home Halloween party as well.
Games to Play with Large Groups
We are limited to a 45 minute party with almost 30 kids, so we pick 3 of these games, and figure that we’ll probably get to two of them. One of the most successful parties we did involved setting up stations. We had 3 games set up, so that the kids could rotate among them. Everyone got to play all of the games and eat lots of treats within our 45 minute time frame- a big success! At another party, we decided along with the teacher to schedule the party right after lunch. We did the games, fed the kids treats, and then sent them outside to play and run all of that sugar off!
Pumpkin Bowling: Get a hold of 4-6 plastic pumpkin buckets and a small ball (plastic bowling balls are perfect). Stack the pumpkins in a pyramid on a hard surface and let the kids bowl to their hearts’ content! Assign a little helper to assist you with picking up the pumpkins and stacking them. This was a big hit with the kindergartners!
Spider Toss : We were looking for a different take on the bean bag toss, so I made a game out of a cardboard box, some fabric scraps, and fabric paint. Basically, kids throw spider beanbags into a “web” with holes.
Web Box: The easiest way to make this is to spray paint the box black, paint on a web with with 3-dimensional fabric paint, and then go back and cut 5 or 6 holes between the webbing, evenly spaced around the spider web.
Spider bean bags: Cut two circles of black fabric and 8 little spider legs for each spider. Pin circles right sides together, pin top of 4 legs to each side (right and left sides) of spider body, remembering to pin the top of the leg to the outer edges to be sewn (don’t pin the foot there). Stitch around edges, leaving a 2 inch opening for turning. Turn the spider body right side out, making sure all of the legs have been stitched on correctly. Fill with dried beans and slipstitched closed.
Face Painting: Paint a spider, a pumpkin or a ghost on their cheek-kids love this!
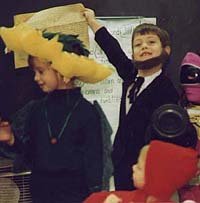
Costume Parade-My kids’ school holds a costume parade every year, and the kids love it! They bring their costumes to school in their backpacks and dress up for the parade and party. If you can’t parade the kids through the school, perhaps you can parade them through another classroom (hold a joint class party) or march them around the room. At home, have a parade down the street, but have some helpers with you to round up straggling troops. Do this during daylight, not nighttime, and be careful of traffic.
Ghost Guess : Kids are divided into two groups. One group goes out in to the hall and a mom puts a sheet over him/her. They then go back into the classroom and the other group of kids has to guess who is under the sheet!
Pin the Nose on the Pumpkin : Pin the nose on the donkey Halloween style. Easy to make with felt and Velcro.
Mummy Wrap– a big hit with older kids, but requires lots of toilet paper! Divide kids into teams of 2. One person stands still while to other wraps them in toilet paper as a mummy at the start signal. Kids are given 2 minutes or so to wrap their friend up, first team to win gets a prize. Then, the wrapped-up kids burst out of their wrappings and it’s their turn to wrap up their buddy. Have the kids help clean up the toilet paper. We did this to the “Monster Mash” song, it was a big hit!
Ghost Bingo-Make bingo cards from poster board but instead the word bingo, put “ghost”. If you really want to go all out, the kids could even have Halloween shapes that they put on the bingo card instead of the standard plastic chips or pennies. When the kids gets bingo, he calls out “ghost”. Make sure there are lots of 7’s and 13’s on those cards!
Spooky Story Round Robin– sit kids in a circle. Someone starts the story (with something like “It was a dark and spooky night…”), and then the person sitting next to them continues the story, adding a sentence or two. Depending on the age, you can set the rules about how scary the story can be.
Spooky ABC’s– Same idea as above, but children name spooky items with the alphabet. Each child must repeat the letters and spooky items said before his/her turn.
Boo, Boo, Ghost– Halloween version of duck, duck goose
Halloween Tic-Tac-Toe-Make the tic-tac-toe cards from orange or black poster board. I like to make the tic-tac-toe pieces out of juice can lids. I paint the lids, then glue on a felt bat, ghost, spider, or pumpkin. I always save those lids (much to my husband’s dismay!), so I have a ton of them. You could also have the children make their own pieces by drawing on construction paper and cutting them out.
Musical Monster Mash-musical chairs with spooky music. Older kids might like to do a “Monster Mash Contest” where he who dances the craziest wins! I’m partial to the Monster Mash, They’re Coming to Take Me Away, and all of those other great, spooky 50’s songs. “Thriller” by Michael Jackson would be a good one too.
Messy But Fun Games-
Try these if you have a smaller group to work with, or time to fill. They are messier than the first games, but lots of fun!
Apple Bobbing-old fashioned and fun, but if it involved water and kids, you know if it will be messy! Great to do outside if the weather is decent.
Spider fishing-Put a plastic spider and a magnet on the end of a homemade fishing pole (stick with string tied on). Fill a small bucket, washtub, or baby pool with water. Add plastic flies with paper clips attached to them, so that the magnet will pick them up. You could also just put the magnet on the end of the fishing string and attach the paper clips to cheap plastic spiders. Go fishin’!
Spider Pinata-Make a pinata out of paper mache! It’s not that hard. Mix one part water and one part flour to make a paste. Dip newspapers in the paste, and then spread over a good-sized balloon. When the newspaper has dried, pop the balloon and cut a slit in the top for placing candy. Spray paint the body black and add legs- the can also be made out of newspaper, or toilet paper/paper towel/gift wrap tubes. You can also use cardboard or chenille bumpies (from the craft store). Open slit at top and fill with candy, taping it back up (black electrical tape shouldn’t show). Hang from a tree and let the kids go at it! Just make sure they hit the pinata and not each other!
Part 2: Activities and Crafts to Keep Them Busy
These are great classroom and room party activities. Some of the messier ones are best done with the smaller groups, or with lots of helpers and plenty of time.
 Gourd Painting– what kid doesn’t love painting? One year, I accidentally planted ornamental gourds instead of pumpkins, and I had TONS of them. We brought them in to my son’s class and all of the kids got to do some “pumpkin painting”. We painted the small, round ones as pumpkins, the tall, strange-shaped ones as ghosts. The bumpy ones got to be warty witches and Frankensteins. After they dried, the kids took them home to decorate for Halloween! This was a very fun project!
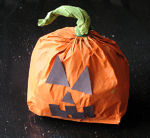
Paper Bag Pumpkins– fill brown lunch bags with newspaper, and let the kids paint their own jack-o-lanterns. Great alternative to painting gourds if you don’t have them.
Pompom Spiders– even young kids can make spiders by gluing two black pompoms together and adding black pipe cleaner legs. Add wiggly eyes for fun.
Pompom Pumpkins-Kids can make a pumpkin from an orange pompomand black and green felt. You can even make the pompoms out of orange yarn.
Clothespin People-Those DMC patterns for clothespin people are great for elementary school kids. Embroidery floss is wrapped around the clothespins and tied off or glue down. There are some great Halloween patterns to use here, or kids can design their own- perhaps a trick-or-treator that looks just like them! Markers, yarn and construction paper can also be used to embellish.
Spooky Hands– Trace the child’s hands, extending the drawings of the fingers to look long and pointy. Let them cut the hands out and decorating them with markers, stickers, paints, etc.
Leaf Print Shirts-Have the kids gather leaves outside. Paint the leaves varying shades of red, yellow, orange, green, etc. and press onto a white shirt lined with cardboard (so that the paint won’t bleed through the other side). You can add a fabric paint medium to regular acrylic paint or just use fabric paint.
Milk Carton Haunted Houses-Ask the teacher if the kids can save their milk cartons for a Halloween project, making sure there are enough saved so there is one for each kid, plus extras for siblings and mess-ups. Kids glue graham crackers (or cardboard squares) to sides of milk carton, and black construction paper or posterboard to the top as the roof. Kids can decorate around the windows with candy corn or other Halloween candy (similar to a gingerbread house) or can paint, use markers, or stickers to decorate their spooky house. At home, you could make an entire spooky town out of cereal boxes, milk/buttermilk cartons, shoe boxes, etc. Add some ghost pops (below) coming out of the roofs and “windows” of the house. Fun!
Ghost pops-I hand these out every year for Halloween. They are so simple, and yet kids still think they are special! I was worried that all of the “cool stuff” being handed out would make my ghost pops look pretty plain, but kids love ’em. They can make them too. All you need is a box of tissue, black string, a black marker, and a bunch of Tootsie and/or Charm Pops. Place the tissue over the top of the lollipop, tie in place with black string, add eyes and a mouth with black marker. Done!
Last year I saw Martha Stewart make cat and pumpkin pops on her show. All you need is some gift tissue paper in black or orange, and some embellishments- green construction paper for the pumpkin top and leaves, or black construction paper for the cat’s ears. You can use white out for the eyes, adding a pupil with a black felt tip pen.These were cute, but too much work for me- I make at least 70 ghost pops a year! I let the kids help, they love it.
Halloween Treat Bags and Placemats– Have kids decorate brown lunch bags by sponging on pumpkins, bats, cats, ghosts, full moon, etc. Great to do with placemats (made from brown bags, butcher’s wrap/freezer paper or Kraftpaper)
Halloween masks– Kids can make masks out of posterboard and a variety of paint, feathers, glitter, crayons, etc. They could be “Mardi Gras” style masks (covering just the eyes), full face masks, or whatever their hearts desire! Punch holes on the sides and add yarn to hold mask on, or glue to a stick like the fancy masquerade masks.
Ghost Feet-This is a lot of fun, but messy. The kids take off one of their socks, you dip the bottom of their foot in a pan of white tempera paint, and then have them make a footprint on a black piece of paper. Immediately wipe their foot off with a paper towel. When the paint is dried, the picture is turned upside down, so that the heel become the head and the toes become the bottom of the ghost. The kids can decorate their “ghosts”, adding eyes and mouth, a bow tie, hair, whatever they like. My son Beau refused to do this at school because the teacher wasn’t wiping the kids’ feet off (according to him, I find it hard to believe). He didn’t want to get his feet dirty. This is the same child that makes mud pies and climbs trees for hours. Go figure!
Spooky Puppets– Kids can make ghost, witch, cat, owl and pumpkin puppets from felt, brown bags, or paper lunch bags. Glue sides together or sew/blanket stitch/whip stitch felt together for them. Let them put on a puppet show.
About the Author
Kim Tilley, a tightwad at heart, is the mother of three active boys and the founding editor of Frugal-Moms.com. Frugal by force and later by choice, Kim cut her income by 60% to stay at home with her children and discovered that anyone can live better for less. Her work has appeared in print publications such as The Tightwad Gazette. In her free time, she entertains herself by chasing kids and finding ways to create something from nothing!


