Are you looking for some gift ideas to make for mom? Find easy and simple to follow gift crafts ideas for kids to make for mother’s day.
Flower Magnets
These are so easy to make!
Materials
Clothespin
Magnetic tape
Fun foam
Scissors
Directions
Cut flower shapes from the fun foam and glue at the top of the clothespin. Cut stem, leaves from fun foam and glue beneath the flower. Put the magnetic tape on back.
Best Cook Hands Down Apron
A great gift for your favorite cook!
Materials
White aprons
Fabric paint
Fabric crayons
Paper
Recipe cards
Directions
Have the children draw a picture of their mom cooking. Draw on paper with fabric crayons that can be used for iron ones. Or, use regular crayon, and take to a place like Kinko’s to have them turn it into a transfer. Iron on center front of apron. Next, put fabric paint on child’s hands and put one handprint on each side of the picture, with fingers pointing down.
Write over picture, “Best Cook, Hands Down” Or something similar. Write some kid’s favorite recipes on the cards. Or, if doing with a daycare group, get several, staple and make a small cookbook for each mom.
Pasta Necklace Jewelry
Even the littlest fingers will have fun with this craft.
Materials
Different shapes of hollow pasta
Food coloring
Rubbing alcohol
String
Ziplock bags
Paper plates
Directions
Put several pieces of pasta, a tablespoon of rubbing alcohol and a couple drops of food coloring into a ziplock bag, close, and shake until colored. Spread on paper plate to dry. Make several different colors. String into a pretty necklace for mom!
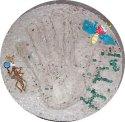
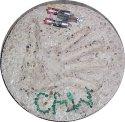
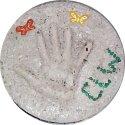
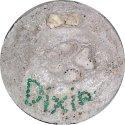
Garden Stepping Stones
These look great in the garden, sitting on the porch, or used as a door stop!
|
Materials
Bag of cement
(buy at hardware or homestore, about $3.00 for a big bag – get the kind that says premixed – just add water. Nothing fancy, just the end line stuff)
Small, durable momentos to place in cement (we’ve used rubber frogs and bugs on one, a pacifier and a rattle in one, and hot wheels cars in one in the past)
Round 9″ disposable cake pans (check to make sure children’s feet fit in these, if not, use a larger size)
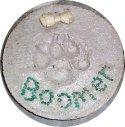
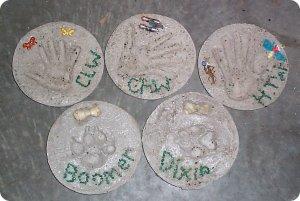
We did our three kids, and our 2 dogs.
Each of the kids picked something special to go in theirs.
Cassie picked 2 butterfly barrettes, Conor a Star Wars toy,
and Hunter chose 2 plastic bugs he received at Bible Camp.
The rocks we used for names are aquarium gravel!
Directions
This project is easier than it sounds 🙂 Do it outside, because it gets messy! Mix cement with water according to directions on bag. Pour in tins. Let it sit until it is firm enough to hold a print. Place child’s foot in center of tin and smoosh 🙂 Try to not go all the way to the bottom! Place small knick knacks around foot print like a toy, etc as listed above.
Cement is hard to write in, but we were able to do initials with aquarium rocks. Let set. Cover with water to cure according to package directions. Let these set for a few days before removing from the tins. These can be buried in the garden as stepping stones, left out on the deck, or anywhere outside. Once hard, they are quite durable!
Craft Stick Picture Frames/strong>
These are a tradition at our house!

Materials
large craft sticks
small wooden shapes
poster paint
photo of child
magnet strips
hot glue gun
permanent marker
Directions
Let kids paint crafts sticks in different colors. Glue together in a frame shape. Paint wooden pieces too, and glue on corners. When dry, write Happy Mother’s Day, the date, etc on the frames. Put child’s picture behind frame, and blue on magnets.
Mom Bed in Breakfast
Perfect for serving mom breakfast in bed!
Materials
construction paper
scissors
markers
glue
clear contact paper
Directions
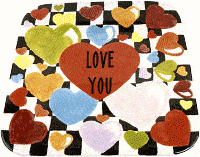
Use a large piece of paper for the placemat. We made ours a checkerboard design. Be creative! Cut out lots of hearts in different colors and sizes. Glue them all on in a collage. Place a large red heart in the center and write something for mom on it. Cover with clear contact paper. Makes a perfect placemat for her Breakfast in Bed!
Book of Kisses
Children can make a “Book Of Kisses” to give to their mothers on Mother’s Day.
Materials
paper
scissors
stapler
markers or crayons
lipstick
Directions
Make booklets by cutting paper into 4 inch squares and stapling ten sheets together in one booklet for each child. Write “Book of Kisses” on the top page and invite the children to decorate the page that is the cover of the booklet. In small groups, color the children’s lips with lipstick and have them kiss each page of the book. Send it home with a note explaining that the mothers can redeem each page for a real kiss. The mom’s will love this gift! Mine did.
Hand Print Mother’s Day Card
Guaranteed to make Mom smile!
Materials
construction paper
tempera paint
pie pan
scissors
a pencil
Directions
Fold the construction paper in half to form a card. Pour enough tempera paint in the pie pan to cover the bottom. Have the child lay the palm of the hand in the paint. Take the hand out of the paint and press the hand on the front of the card, with the small finger along the folded edge. Let dry. Leaving the card folded, cut out the handprint so the card is now in the shape of the handprint. Open the card and write any message you like!
Stained Glass Candle Jar
This pretty gift is so easy to make!
Materials
tissue paper
small baby food jars
glue
water
paintbrush
scissors
votive candles
Directions
Cut tissue paper into small pieces. Mix water and glue to thin it, and then paint the jar with the mixture and place the tissue paper on. Then, after that has dried, paint over the tissue paper with the same mix. Put a tea light inside and you have a beautiful candle. These can be customized to any season or event, depending on the colors of tissue paper you use.
Variation – Use a Nestea or glass juice bottle and instead of a candle holder, you have a pretty vase for mom!
Sand Candles
Sand candles make a pretty, inexpensive gift for mom or grandma.
Materials
candle wick& candle wax
(available at craft supply stores)
baby food jars
salt
food coloring
Directions
To make colored sand mix salt and food coloring in a ziploc bag then microwave for a few seconds. Fill a baby food jar with colored sand and insert wick. Next, pour melted wax on top.
Fill a shallow pan with sand. Make an impression in the sand, add the wick and pour melted wax in the sand. Layer with different colors of wax. After the wax has cooled remove candle. Some of the sand will stick to wax.
Yummy Cups
Mom will love these special treats just for her.
Materials
plastic cups
markers
tissue paper
candy and assorted goodies
Directions
Take a regular plastic cup – bright colors are cute! Let the kids decorate outside with marker. Help them write the occasion : Happy Mothers Day! Love you ! etc… We used med. pink cups with light purple tissue paper stuffed inside cup. Then let the kids fill with goodies for their Mom! We used a baggy of Hershey kisses, some gum, a small note-pad, and various other candies.
This Mom Deserves A Pat On The Back
Mom will be proud to wear this shirt!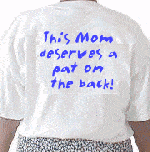
Materials
T-shirts
Fabric Paint
Directions
Have the children make hand-prints on the back of the T-shirts, then write, “This Mom Deserves A Pat On The Back.”
Picture-board for Grandma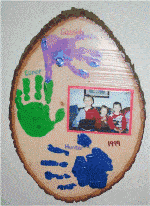
A wonderful gift for Grandma!
Materials
wood slices (flat slab of wood, a bit bigger than a handprint. You can get these at Wal-Mart or a craft store)
fabric paint
picture of child
construction paper
tacky glue
modge podge
paintbrush
Directions
Cover child’s hand in fabric paint, and put a handprint on the wood. Cut the picture out into a fun shape, and cut a piece of construction paper a bit bigger in the same size to make a border around it. Glue paper and picture on board. Let glue and paint dry, then cover with 2-3 coats of matte finish modge podge.
We did ours on a larger piece of wood and did all three of our kids’ handprints and a group picture. Also, add the dates, the kid’s names, and a saying like “Happy Mother’s Day” if you want!
Mother’s Day Pins
Moms love to wear jewelry our children make us!
Materials
wooden circles (2-3 inches)
black ink pad
markers
spray laquer
jewlery pins
hot glue gun
Directions
Paint the wooden circles white and let dry. Let children press thumb into ink pad and press onto circle. Write Happy Mother’s Day with markers and color on a flower. Glue pins on the back with hot glue gun.
Mom’s Recipe Holder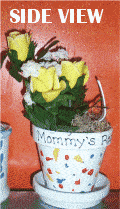
This makes an extra special gift for mom or grandma.
Materials
clay pots
white paint
fabric paint
plaster of paris
silk flowers
permanent markers
craft moss
plastic forks
hot glue gun
recipe card
Directions
Paint the pots white and let dry. Glue Pots to saucers, making sure to plug up the hole in the bottom of the pot.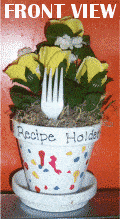
Fill with plaster(mix according to package directions) When it starts to set, insert plastic flowers and fork with tines UP and cover plaster with moss.
When completely dry, decorate the outside and insert mom’s favorite recipe on a card in the fork!!
Hand print Plaques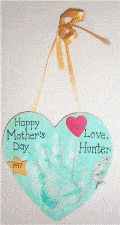
This lovely handprint plaque will surely touch mom’s heart!
Materials
Plaster of Paris
molds in different shapes and sizes
tacky glue
ribbon
silk flowers
permanent marker
paint
Directions
Mix plaster according to directions. Place a ribbon to hang the project into the mold and bury it in the mix so that it will stay on securely.
When it is not dry, but will “hold” a handprint, place child’s hand in the center and press firmly and hold for about 10 seconds. Be careful not to push all the way to the bottom. Make other plaster shapes in assorted sizes and let dry.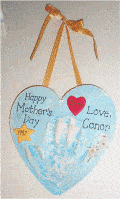
Paint in the colors you choose and set aside. To color the large mold, put a squirt of poster pain into a bucket of warm water and mix it up. Quickly dunk the dried hand mold into the water and take out. Repeat for darker color. This gives a creative water color look. Let dry over night.
The plaster MUST be completely dry and hard before doing this. When all pieces are dry, write with marker, glue on flowers and small molds and cover with spray laquer.It’s hard to see in the pic, but we put their ages on the red heart, and the year on the yellow stars 🙂
Fun Foam Flower Pot
A definite keepsake for mom, grandma or auntie.
Materials
Flower Pot
acrylic paint
flowers cut out of fun foam
glue
craft sticks
picture of each child
spanish craft moss
foam brick or clay
Directions
Let children paint their flower pot. Let dry. Decorate, write Happy Mother’s Day, etc. Have children glue their flowers on craft sticks. Take the child’s picture and cut their face out and glue on one of the flowers. Put piece of foam brick or clay in bottom of pot, add moss. Stick 3 or 4 flowers in the pot.
Variation:
Instead of cutting flowers out of the fun foam, cut out the kids’ handprints and make those into the flowers! Very Cute!
Window Knick Knack
This easy craft makes an adorable gift for mom or grandma.
Materials
Cereal box for each child
clay
dried flowers
paint
scissors
(adult can do the cutting part ahead of time, if nec.) Cereal box can be the small individual size, or a larger one depending on what size you want your gift to be.
Directions
Sit box upright and cut off part of the front leaving enough at the bottom for a flower box (planter, so to speak). Cut little blocks from the back resembling panes in a window. Paint box white and decorate as desired. Put a clump of clay on the bottom of the box toward the front. Stick dried flowers into the clay so that they come forward and stick out of the “window”.
Mommy Trivia
Show Mommy how well you know her!
Materials
markers
crayons
construction paper
a sense of humor 🙂
Directions
Ask children questions about their mommies and write the questions and answers down.
What is your Mother’s name?
How old is she?
How tall is she?
How much does she weigh?
What color is her hair?
What does she do around the house?
What is her favorite drink?
What is her favorite thing to eat?
What is her favorite TV show?
What does she cook?
Where does she like to go?
What is her favorite hobby?
Then have them draw pictures of their mommies. Give these to their moms. Last year the moms got a big kick out of learning that their hair was blue, their favorite drink was wine, etc.
Wrapped Around My Finger
Materials
Good watercolor paper
acrylic paint
foam brush
fame, glass and mats
gold metallic marker pen
black calligraphy pen
Directions
Using foam brush, paint child hand with paint and press onto center of paper. (Wear smocks, this paint does NOT wash out :)) Let dry. With gold marker, draw a fancy bow around one finger. In the upper right corner, write in fancy writing, “Mom, I have you wrapped around my finger”. After dry, insert in frame with mat. This makes a beautiful lasting gift for Moms or Dads.
Share a Snack with Mom
Enjoy a few moments to share your snack with mom!
Materials
large brown paper bags
scissors
paper punch
colored ribbon
markers, stickers, etc
napkins
juice boxes
popcorn, snacks, etc
Directions
Cut the bag off about 1/2 way down. Punch holes all the way around the edges and have the children thread a ribbon through the holes. They can then decorate the bag any which way they like. The children then place two napkins, microwave popcorn, two juice boxes, and place them in the bag and tie the ribbon up in a bow. The children can go home and have a nice quiet snack with mom.
I Love You This Much Card
You are sure to touch mom’s heart with this easy craft.
Materials
String
contruction paper
stickers, markers, etc
stapler
Directions
Cut children’s handprint out of colored paper and decorate as desired. Have children stand with arms all the way out and cut a piece of string to reach all the way from one hand to the other. Staple ends of string to each handprint. Cut out a heart shape and staple into the middle. Write “I love you THIS much” on the heart. Kid’s can use large piece of paper to make their own envelopes for the card if desired.
Mom’s Bag of Love Care Package
A sure fire way to show mom how much you love her.
Directions
I recently went to a class for parents and providers and the speaker gave everyone a little baggie with a slip of paper in it. On it was written:
A STICK OF GUM – to remind you to stick with it.
A CANDLE – to give you light when you feel burned out.
A CHOCOLATE KISS – to remind you that someone cares.
SMARTIES – to help you on days when you don’t feel so smart.
LIFESAVER – to remind you that everyone needs help once in a while.
A SNICKER – to remind you to see the funny side — there is one!
A ROSE – to remind you to take time to smell the flowers.
CONFETTI – to help you celebrate the good times.
A PENNY – with thanks for sharing your thoughts.
A BAG – to help you keep it all together.
Easy Ideas For Mom’s Day
Here’s some super fast ideas!
- Have the children go through magazines and find pictures of all the things their mothers do. Cut them out and glue them onto construction paper. The same can be done for dad. Another variation is to have the children cut out pictures to represent the people in their family and the things they like to do as a family.
- Because some children do not live with (some do not even know) one parent or the other (or either), remind children that they can make gifts for “Someone Who Is Like a Mother To Me” or “My Special Person” ….
- How many people are in your family? Who is in yours? What daddies and mommies do? Favorite activities with mom, dad, siblings? Old/young; grandparent, parent, child, etc. . .
- Have the children discuss what other Mom’s in other countries might do.
- Talk with the children about what mother’s do and what their mother does for them.
- Name three mothers in your family. Name three mothers outside your family. Name three people who might be mothers one day. How are human moms like animal moms, and how are they different? What do you think moms like about being moms?
- Ask the child to tell you one thing they love about their mom and then write it on a big heart which you paste into the center of a fingerpainting the child has done and then display them for everyone to read. (great for daycare centers or groups like girl scouts, etc)
- For Mother’s Day we usually paint a plant pot and then re-pot a petunia into the pot.


