You have come to the right place if you are looking for fun, engaging and exciting Bubbles themed activities to do with toddlers, preschoolers and kindergartners. Our activities are widely used by teachers, moms, dads, child care providers and more!
All our activities are available at no cost and are free to print and share. Select below to get started.
Bubbles Arts and Crafts
Colored Bottle Bubbles
Fill a plastic pop bottle one third full with water. Add tempera paint & about 1/3 cup of liquid detergent. Let the children shake the bottle to make colored bubbles. I like to tape the cap on using masking tape.
Bubble Wrap Painting
Use bubble packaging to paint with. It works well if you make the packaging into a glove (fold over and staple) I used this on fish – they looked awesome.
Bubble Painting
Add some liquid tempera to bubble mixture, and hang poster paper on the easel, have the children blow bubbles on to the paper, and watch the design that forms when they pop.
Bubble Page
Cut out a big round circle from white finger-paint paper. Have children use watercolor paints on it so looks like a bubble.
Bubble Pens
Mix a T. of dry tempera paint with 2T. dishwashing liquid and 1/2 cup water. Pour a small amount into a clean glue bottle. Shake the bottle really hard to create bubbles and make designs on paper.
Bubble Prints
Put dish soap (a lot, you’ll have to play with measurements), water and Tempera paint in a container (we use our easel paint cups). The child (or adult) blows in to the cup to make bubbles. “Take a picture” of the bubbles by putting a paper over the top of the cup. Caution… talk about blowing out not sucking in the bubble water. Put a tray under the cup, as this gets quite messy.
Bubble Craft
Cut a circle from white tag board, then cut out the center to form a ring. Glue a little larger piece of wax paper behind the ring. Use watercolor Markers to decorate bubble and wipe away the beaded marker drops to create an opaque look.
Bubble Colors
Each group of 4 students helped to make a table bubble. We placed a black trash bag on a table and coated it with bubble mixture. Using a straw, each group blew a bubble on top of the black bag.
Next we placed a “bubble home” around each bubble. (To make a bubble home, we took 4 sheets of 8″X10″ oak tag paper and stapled them to make a cylinder shape.) The contrasting colors of the black plastic bag and the white oak tag made the colors of the bubbles more prominent. We observed the bubble colors until it popped. The colors and patterns are very easy to see. We observed several bubbles in this manner.
Some of the questions I asked them were:
What colors and patterns do you see?
What happens if you blow lightly on a bubble?
Can you tell exactly when a bubble will pop? (I won’t tell you what we found, but we (the teachers included) were amazed at what we learned.
Bubble Prints: We mixed bubble solution with lots of tempera paint and placed it in large margarine tubs. (Any shallow container would do.) Three children at a time would blow bubbles until the bubbles were higher than the rim of the dish. Then one child would take a white piece of construction paper and place it on top of the bubbles.
We used blue, magenta and green for our colors and they turned out beautiful. (Someone on the loop asked about using food coloring instead of tempera. I used food coloring last year and it wasn’t as bright as the tempera.)
Bubble Critters
Have the children cut out several circle shapes and create their own bubble animal/shape out of the circles.
Personalize Bubble Wands
Use a thin piece of craft wire about 7 inches long, and bend it to form a wand. Form a circle at the top of the wand and bend it around and form a handle. I let the kids put beads (we used beads with letters on so they could form their names) any kind will do.
Then when they get done with putting beads on the handle, I twist the bottom to hold the beads in place. The kids went right to work blowing bubble solution thru these one-of-a-kind bubble wands.
Catching Bubbles
Put a little tempera paint in your bubble juice and blow bubbles outside while the children run & catch the bubbles on paper.
Coffee Filter Bubbles
We folded coffee filters into a pizza slice shape and dipped them in a mixture of food coloring and water to make a bubble. When we unfolded their filters, a colorful tie-dye pattern could be seen.
Bubble Wrap Pictures
Pictures made with bubble wrap for used for packaging–cut into small pieces and let them dip on paint and then press on paper.
Bubble Windows
You’ll need 2 straws and 1 yard of cotton string per child. Thread the straws onto the string and knot the string. Slide the knot inside one of the straws. When you hold one straw in each hand and spread out the string it should look like a rectangle. The children dip the bubble windows into the bubble solution while holding the straws side by side. As they take the windows out of the solution, they should slowly pull the straws apart. This will make a window of bubbles.
Some questions I asked were: What happens when you pull your window through the air?
Can you poke things through without popping it?
Can a friend put his/her finger through the window without popping it?
Can a friend put another window through yours?
Bubble Prints
For each bubble print color desired, mix one part liquid tempera paint with two parts liquid dish soap in a small container. Place a straw in the solution and blow until the bubbles rise above the rim of the container.
Remove the straw and place a piece of paper over the bubbles. As the bubbles break, they will leave a print on the paper. (Each child will need a straw for this activity. A pin may be used to pike holes near the top oft he straw to prevent the children from accidentally sucking in the paint mixture.)
Paint with Bubbles
Supplies 1/2 cup Ivory Flakes, 1/2 Cup Water, Mixing Bowl, Spoon, Electric or Hand Mixer, Food coloring, Shelf paper or Butcher Paper, A few small containers, Newspaper Use the mixer to whip the Ivory Flakes and water until it is thick and stiff. Put some of the “fluff” into cups or small containers and add food coloring to make any colors you choose.
Cover the work area with newspaper. Lay out the shelf or butcher paper to work upon. Have child spread the bubble paint with his/her fingers. Let the picture dry over night. Bubble paint without food coloring looks like snow and can create some neat effects. The children also like to use different colors of “fluff” to make their pictures.
Bubble Jar
Fill a small plastic bottle half full of water. Add a few drops of food coloring, if desired. Add baby oil or mineral oil to completely fill the jar. Secure the bottle tightly. Then slowly tilt the bottle from side to side. When this occurs, the liquid in the jar resembles waves. Bubbles can be created by shaking the bottle. Encourage the children to observe these reactions.
Long Bubbles
You will need Styrofoam cups, rubber bands, straws that do not bend, and a piece of cotton cloth. Fill the cup half of the way with solution. Poke a hole near the top with the straw and insert.
Cover the top with a square of cloth (I use an old piece of flannel or cut up towel) secured with the rubber band. Then have the children blow into the straw and watch the bubbles come out the top. If it works right, the bubbles will be in one long continuous piece…really cool.
Large Bubble Wand
You will need: an old cotton T-shirt or cloth, a wooden dowel or pipe of some sort (PVC is probably okay but not too thick 1 inch thick) two large steel washers (or flat rings)
1.Cut the T-shirt along the bottom twice so that you have two strips of cotton fabric about 1 1/2 inch thick that are circular.
2. Cut both pieces so that you now have two long strips of fabric.
3. Knot the two strips together so that you now have one very long strip of fabric.
4. Thread the washer through the dowel.
5. Thread the fabric through the washer (the one that is threaded through the dowel) the dowel, washer and fabric should all be connected.
6. Tie the fabric to one end of the dowel.
7. Thread the other washer through the fabric and knot the two ends of fabric together so that you now have one circular piece of fabric and the washer is hanging at the bottom of the fabric. Now, the washer that is threaded through the dowel should be able to pass along the dowel from where the fabric was tied to it all the way down to the end of the dowel. The other washer should be hanging at the very tip of the fabric since this washer is what helps to keep the fabric steady.
To make the bubbles: Slide the washer along the dowel to the end where the fabric was tied. (Be sure to let some of the fabric droop on the top part.) Tip the fabric into your bubble solution. Carefully take it out and begin to slide the washer along the dowel. You should be able at this point to see the soap film.
Gently move the dowel so that the film begins to move and fill with air. When you see a bubble begin to form, slide the washer back to where you started to close the bubble up. I know this may sound hard but it really isn’t and the bubbles that you get are huge. I’m not teaching now since school is out but my 2 year old had a blast watching us make the bubbles.
Just a note: I say cotton fabric because I was told this would only work with 100% cotton. I’m not sure because I only use the 100% cotton fabric.
Lesson Idea
Air is a real substance and has weight. Light sometimes changes color when it passes through water. Science can be fun. Needed: Liquid detergent, straws, cups, construction paper, and crayons. Put a small amount of soap and water into cups so that each child has a cup of soapy water. Dip the end of the straw into the cup; remove straw allowing the soapy mixture to drip once.
Blow gently and produce a bubble. Talk about air being inside of the bubble. Talk about how the bubble has different colors because light changes when it shines through the bubble. Ask the children why they think bubbles burst when they hit the ground.
An Explanation of Principles
Light is broken into different wavelengths as it passes through water, allowing the different colors to be seen. Wet rings on the construction paper show that a bubble is composed of water surrounding air.
Bubble Questions
We answered the question, “What do you know about bubbles?” and wrote the children’s answers on chart paper. We compared these answers with the answers given on Monday. They were much more informative and diverse.
Click here for a bubble frame project
Bubbles Games and Activities
Dancing Bubbles
Have children break up into groups of 3. Holding hands forming their own circle. Have several groups of children slowly and gently spin. Tell them to “float” like bubbles. Works best in a large area designed for large motor activities.
As the children float and drift, they will eventually “dance” into each other, causing the bubble to get bigger, until all the little bubbles, join with each other, and form one large bubble, continuing to dance until the large bubble eventually bursts or “pops”. The children like to do this dance to soft music, and will ask for this activity over and over.
Bubble Experimentation
Bubble blowing naturally gives rise to scientific investigation. Your children will notice that not all bubbles behave the same way.
Let your children experiment with bubbles and they may discover answers to some of the following questions:
What happens if they blow hard?
If they blow softly? What color are bubbles?
Are all bubbles the same shape? The same size?
If they touch a bubble what happens?
How long do bubbles last?
Have plenty of small no-spill bubble container’s ready, and plenty of extra wands, and ask each child to help fill the room with bubbles!
Bubble Count
Encourage the children to blow a set of bubbles that you specify. For example, if you say the number “three,” the children would try to blow three bubbles.
Jumbo Bubbles
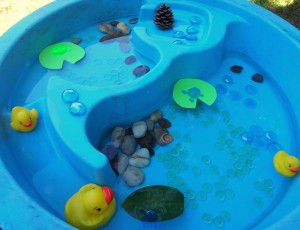
Fill a small wading pool with bubble solution. (Combine 1 part
Liquid dish soap w/12 parts water and a few drops of glycerin or Karo syrup.) Use
Different bubble-blowing tools: plastic rings from soda six-packs, for instance, or wands made from pipe cleaners. And what do you have if a child stands inside a hula-hoop in the pool and you pull the hoop up around him? A human bubble!
Bubble Bag
Fill a large re-sealable freezer bag with styling gel. Tape the top portion with clear mailing tape. Put the bags out on the table for kids to explore. Talk with them about the bubbles in the gel, the smooth texture, the squishy gel, and their squeezing actions.
You can make a variety of bags by adding some of the following: food coloring – let the kids mix the colors into the gel by squeezing the bag glitter or sequins – they can watch it move around as they squeeze the bag.
Mounds Of Bubbles
Add bubble bath to a washtub, fill with water on high pressure to form lots of bubbles. Pour out some of the water after the bubbles have formed – the pan should contain mostly bubbles with just a small amount of water. Let the kids explore the bubbles.
Talk with them about the mounds of bubbles and the tiny bubbles. Let them clap with bubbles in their hands to see what happens. Add a few sponges to the bubbles; encourage them to squeeze the sponges to make more bubbles. Replace the bubbles and water as needed.
String Bubbles
Use a piece of cotton string, about 24 inches long, then tie the two ends together, dip the string (and my hands) into the bubble solution. Carefully open, and hold open so that you can see the film of soap, pull backwards, and ta-da!! I have made bubbles over 6 feet in length.
Bubble Blowers
· Cut out the center of a margarine lid
· Cookie cutters
· Flyswatter
· Rubber band
· Strawberry baskets
· Six-pack rings
· Egg poacher trays
· Funnels
· Scissors -hold the blades and dip the finger holders into the bubble solution
· Tin can – open at both ends
· Paper cups – poke a hole in the bottom
· Drinking straws – individually or in a group banded together
· Hula-hoop
· Pipe cleaners
· String
· Slotted spoons
· Potato masher
· Strainer
· Cardboard tubes
· Turkey baster
Hand Wand
Put your hands in the bubble juice and place your pointer fingers and thumbs together (making a circle). Then you can pull your hands out and blow through your circle. You don’t need a bubble wand!
Wash Dolls
Fill the sensory table with warm water and add a few tablespoons of dish soap. Provide plastic dolls, washcloths, and towels.
Dish Washing
Place plastic dishes and dishcloths in the sensory table filled with warm soapy water. A dish drying rack could be set up nearby or towels provided to dry the dishes.
Bathtub
Set out a large cardboard box, shower cap, towel and other bath items. Encourage the children to pretend as if they were taking a bubble bath. Engage them in pretend play, but let them direct it after the suggestion has been given.
Wet and Dry
While blowing bubbles with the children try touching a bubble with a dry finger. Repeat using a wet finger. What happens? You will observe that bubbles break when they touch an object that is dry.
Bubble Sheet Stomping
It’s also fun to put big sheets of bubble wrap on the floor and they can jump on them to pop the bubbles.
Sand and Water Table
Put some liquid detergent in your water table with straws. (Remind them to only blow out.)
Transition Activity
Have the children lay on their backs not touching anyone. Play soft music and have the children relax. As the children relax, blow bubbles over the children, encouraging them to let the bubbles land on them. Ask them what they feel like etc. This is a good activity right before nap.
Whipped Cream
Make whipped cream. When you first start mixing you can see the bubbles. As you continue to whip, the bubbles get smaller & smaller. When they understand that whipped cream is just really small bubbles you can introduce shaving cream as the same concept.
Put shaving cream on the table and let them smoosh it all over the table. You can add a little paint and then they can lift a print that way too.
Bubbles Recipes and Snacks
Stronger Bubbles
Add some glycerin, to some dish soap, and it will strengthen your bubbles. You can find the glycerin at your local pharmacy.
Bubble Solution
3/4 cup Joy brand liquid dishwashing detergent 1/4-cup glycerin 1/2 gallon water Mix all ingredients & pour into a shallow pan. Excess solution can be stored in a sealed container. This solution works best if it is allowed to set for several days before use.
Bubble Solution
1 cup of water 2 tbsp liquid detergent 1 tbsp glycerin 1/2 tsp sugar
Bubble Solution
2/3-cup liquid dish detergent 1 gallon water 1 tbsp glycerin (optional)
Bubble Solution
3 cups water 2 cups Joy liquid detergent 1/2-cup Karo syrup
Combine ingredients and allow to sit in an open container for at least a day before using. The longer the solution sits the better the bubbles.
Bubbles Songs, Poems and Finger Plays
Blowing Bubbles by Ericka Northrop
Come with me; forget your troubles.
We’ll take some soap and make some bubbles!
We can make them big or small;
It isn’t very hard at all.
I can’t be angry, sad or blue
when blowing bubbles-now, can you?
Just blow your blues into each one.
We’ll watch them sparkle in the sun.
We’ll send them out into the sky.
There go your troubles! Poof! Bye-bye.
My Love To You
Bubbles float high and bubbles float low
Bubbles filled with love wherever they go
So reach out and grab one it’s my love to you
This is the way I bid you adieu adieu, adieu, adieu to you
So reach out and grab one it’s my love to you.
POP! Goes The Bubble!
(sung to “Pop Goes the Weasel”)
Soap and water can be mixed.
To make a bubble solution.
Carefully blow. Now, watch it go!
Pop! Goes the bubble!
Can You Blow a Big Bubble?
(sung to “The Muffin Man”)
Can you blow a big bubble? A big bubble, a big bubble?
Can you blow a big bubble, with your bubble wand?
I’m A Little Bubble (tune: “I’m A Little Teapot”) I’m a little bubble, shiny and round. I gently float down to the ground. The wind lifts me up and then I drop. Down to the dry ground where I pop.
Ten Little Bubbles (Sing to the tune of “Ten little Indians”)
One little, two little, three little bubbles.
Four little, five little, six little bubbles.
Seven little, eight little, nine little bubbles.
Ten bubbles floating to the ground.
Here’s A Bubble
Here’s a bubble, here’s a bubble.
Big and round; big and round.
See it floating gently, See it floating gently,
To the ground; to the ground.
Here Is A Bubble
Here is a bubble (make a circle with thumb and index finger)
And here’s a bubble (make a bigger circle with two thumbs and index finger)
And here is a great big bubble I see. (make a large circle with arms)
Let’s count the bubble we’ve made. One, two, three. (repeat prior actions)
Draw A Bubble
Draw a bubble, draw a bubble. Make it very round.
(make a shape in the air with index finger)
Draw a bubble, draw a bubble. No corners can be found.
(repeat actions)
Bubbles
(sung to “Twinkle, Twinkle”)
Bubbles floating all around (pretend to catch bubbles)
Bubbles fat and bubbles round (make a big circle w/ arms)
Bubbles on my toes and nose (point to toes; point to nose)
Blow a bubble. ..up it goes! (pretend to blow bubble; point up)
Bubbles floating all around. (pretend to catch bubbles)
Bub. . .bles fall. . .ing to…the…ground. (sing slowly & sink to ground)
My Bubble
Here I have a new bubble (make circle with thumb and pointer finger)
Help me while I blow: Small at first, then bigger (make circle with thumbs and pointer fingers)
Watch it grow and grow. (make circle with arms)
Do you think it is big enough? Maybe I should stop;
For if I give another blow, My bubble will surely POP! (clap hands)
Bubbles
This is the way we blow (pretend to blow, rounding hands as if holding up our bubbles, a bubble, spreading farther apart)
Blow, blow, blow.
This is the way we break (Clap hands together on each oh) our bubbles, Oh!, Oh!, Oh!

Dear Reader: You can help us make this theme even better!
All of our theme ideas have come from our imagination and from reader submissions. Please use this form to contact us if you have crafts, activities, games, recipes, songs or poems that you would like us to add to this theme.

